
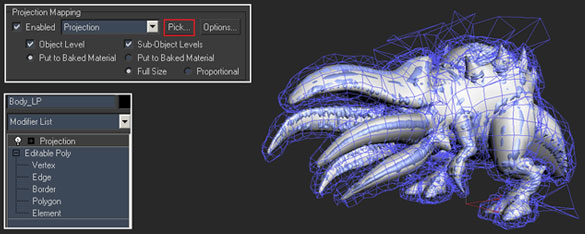
8. Now that all of my settings are in place I went ahead and hit the "Pick" button . The "Add" targets dialog box appeared and I selected the high poly target mesh, this applied a projection to my modifier stack. As you can see from the image below the cage for the projection is unadjusted and all over the place.
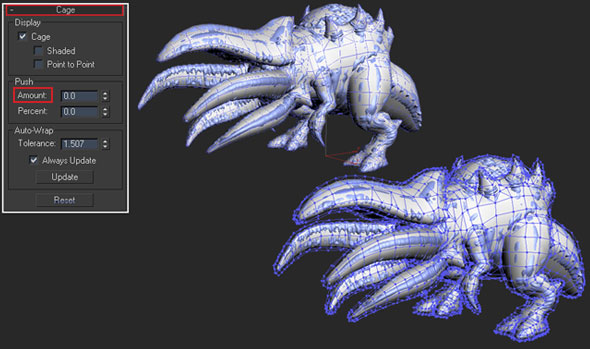
9. My next step was to go into the "Cage Rollout" and hit the reset button to get the things back in order. With my cage reset I went ahead and pushed the amount to around 0.75
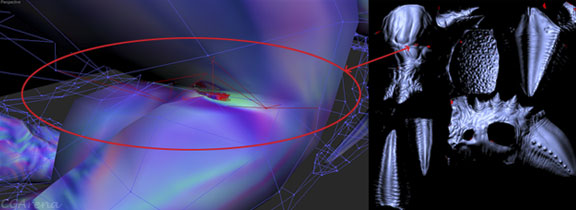
At this point I’m now going to go over my normal bake and investigate what needs adjusting. The reason is no matter how perfect your mesh and cage are you will most likely have to make some small adjustments to the cage and in some cases the model after the first bake. You can see from the image below what needed fixing to get rid of the obvious red spots. Now when I say “obvious red spots” I mean parts of the mesh where the cage is intersecting with the low poly mesh geometry. Keep in mind that there are other instances where you’ll have red spots no matter what you do, this is caused by overlapping, intersecting geometry, missing faces, missing UV chunks, etc. In this models case most of the red spots were due to the cage not being out far enough in certain areas. The only exceptions were the armpit and inner thigh seem. I went in and adjusted those areas, you can see an example of one of the trouble spots in the image below.
“Special note”, you can hide the high poly mesh when making adjustments to the low poly mesh. The changes you make will still apply once you're fished and you’ve unhidden the high poly mesh. Now that I’ve fixed my trouble spots I did another render. You can see from the image below that I was able to get a cleaner normal map from the second bake, yay! Now that the bake has turned out successfully I went ahead and repeated the process for the tongue in a separate 3dsmax file. Speaking of which, you should always try “if you can help it” to create your models in separate elements. This way you can bake out the elements separately from higher resolution source meshes.
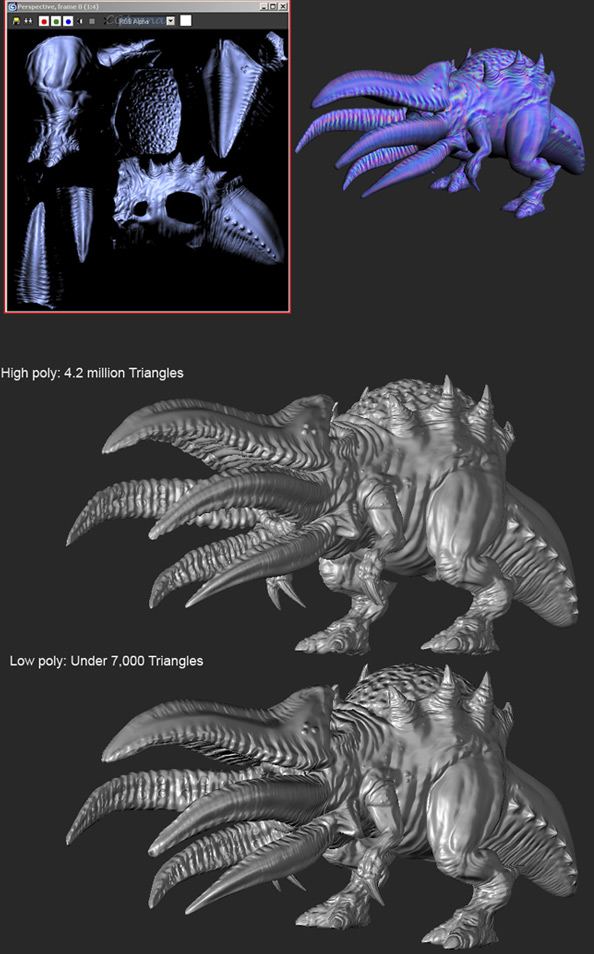
In closing, by following these easy steps you could see that I was able to get a solid normal map. The overall keys to achieving these results comes from having a clean low poly model, clean high poly model, and solid UV work. Nonetheless, there’s no magic bullet to this and it takes a bit of practice and patience. You can see the normal map results below when compared to the high poly version.
Light Map Generation
All right, now that I have the normals baked out I can move onto baking the light map. This step actually benefits from all of the hard work that was done in the normal map bake setup. While still having my normal map file open I went ahead and renamed the file “Paragalis light map bake”. Once that was done I simply followed these steps:
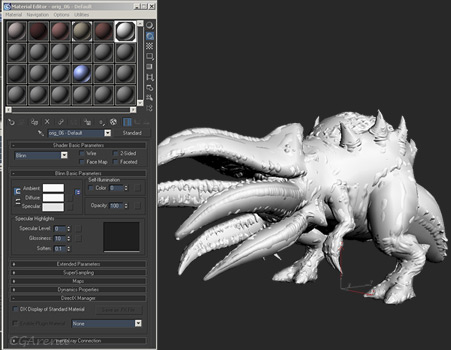
1. I opened the material editor and created a solid white material. The next thing I did was apply the material to both the high poly and low poly mesh.
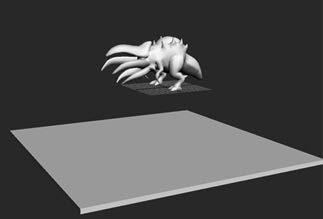
2. After that I created a white floor “box” underneath the grid and moved it a few units below the model. Having the floor in the scene allows for shadows to be baked into the underbelly of the mesh. The closer the floor is to the mesh the darker the shadows and vice versa for lighter shadows. “Special Note” ordinarily it’s good to have some nice shadows underneath the mesh to create depth but it’s not appropriate to have the shadows appear completely black either. The same could be said for any and all intersecting geometry.
3. Then I went ahead and added a skylight to my scene and raised it above my mesh.
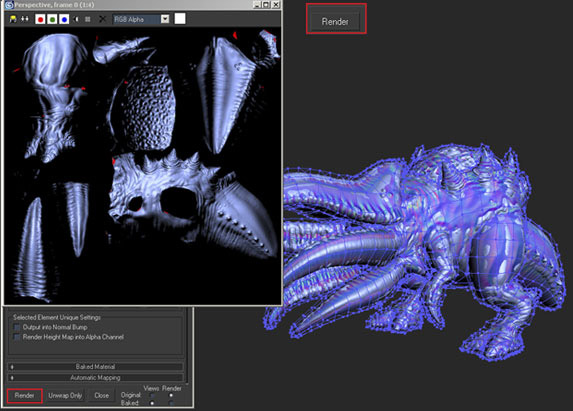
10. Once everything is in order I hit the “Render” button on the Render to texture dialog box.

I
I
I
I
I
I
I
I
I
I