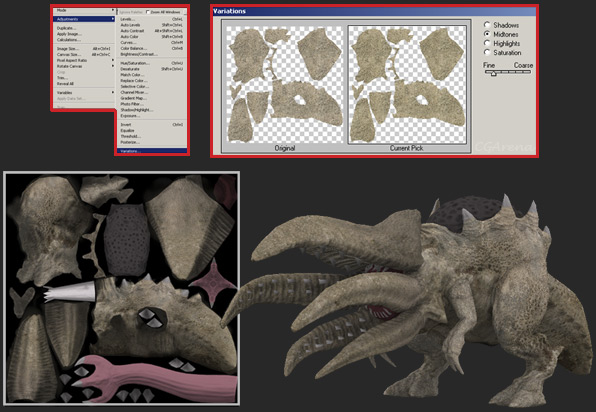
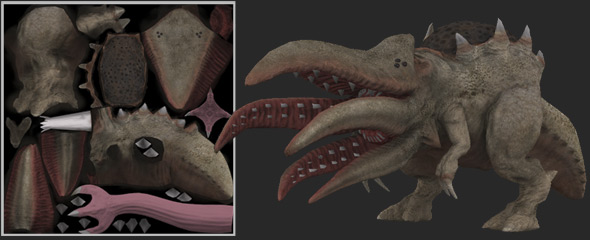
With everything in place it’s time for me to start combining and layering the various materials. Phase one is where I start blending the materials A, B, and D. At this point I want to give a good once over to the surface area adding in some nice sporadic splotches of skin. I try to keep the skin interesting by varying the opacity, contrast, and color. Speaking of color, I tend to match the color values by adjusting the “variations” as I go along. The Image/Adjust/Variations works much better than Hue/Saturation because it shifts all of the color values, unlike Hue/Saturation which moves the image towards monochromatic values. It’s really important to keep this is mind since the source materials carry a nice sense of natural color embedded in the photos. This works wonders when it comes to selling the photographic nature of a skin.
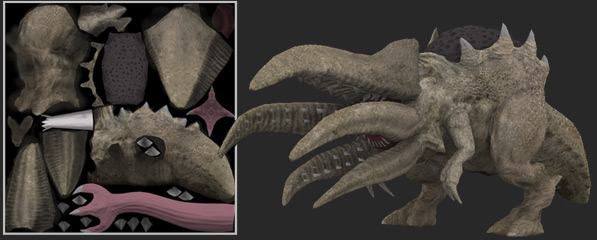
Continuing work on the base skin, I move into phase two where I’m refining the various skin elements. I started to add in materials E and F, which provide even more interesting results. This is especially true of material F, which is used primarily around the back of the thigh and tail, having the big small detail keeps things interesting. Speaking of which it’s always good to vary the scale of each skin element as well, since an animal's skin is rarely if ever uniform in size throughout.
Continuing work on the base skin, I move into phase four which has me combining all of the material elements giving it a cohesive feel. I tend to spend a good deal of time at this stage making sure things feel natural asking myself, “does this look right, does it feel out of place”. What I like to do at this stage is to reference actual animals, I like to see where dirt accumulates, bruises, color shifts, scars, bumps, you name it. My main priority is making sure that the entire skin looks “believable” and natural.
On a last note about the skin: I try to remove as much noise and intrusive light as possible, leaving those elements in place tend to make the texture overly grainy and disjointed. I ususally remove the lighting and noise in the original material itself by first lowering the contrast and also by setting my brush mode to normal and painting them out.
Continuing work on the base skin, I decided to add some color in the mouth area. I used some references that I had of human gums, and fish gills “pretty weird huh”. Along with adding those details I kept refining the color by adding elements that worked with the creature’s physical body and nature. For instance I made sure to add some exposed skin color around the mouth, back of the head, around the fingers, bottom of the tail, and the base of the spikes across its back.
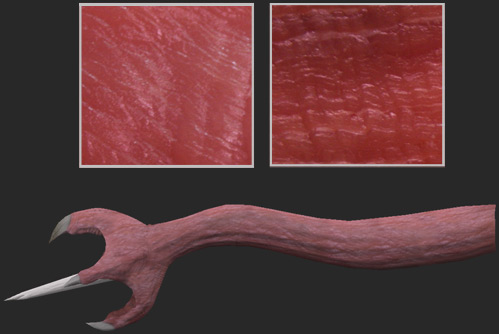
Now that I’m happy with the base skin it’s time for me to work on the tongue. The tongue in particular needs to be interesting enough to stand out when launched but it shouldn’t take away from the body as a whole! I used two main material elements reflecting the desired surface type for the tongue base. Both elements were taken from photos of skinless salmon; I thought it would work as a nice base due to the surface qualities. Since I don’t want the tongue to be as red as the source material I shifted the color by using “Image/Adjust/Variations”. I also want to point out that I varied the scale from the back of the tongue to the front; this gives it a sense of overall scale and dimension.
Painting and color blending using this technique in particular is a tricky affair and it requires a subtle touch. A number of years ago before normal maps and advanced game engines, artists were essentially painting in all of the values into their textures. Everything from shading, mid tones, highlights, etc. were built right into the diffuse map, with specular and bump maps playing a supportive role. Well in this day and age it’s important to have a better sense of balance as texture artists have to think ahead in terms of how AO/light maps, normal maps, specular maps, alpha maps, SSS, post processing etc. all work with each other. In short, the responsibilities for a texture artist have been expanded to some degree in this generation.
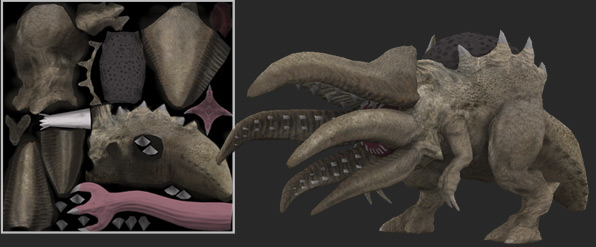
Continuing work on the base skin, I start to add materials F and C. Material C in this third phase is extremely important since it’s what I like to consider a transitional element. This material element will serve to bridge the outer skin with the mouth skin, underbelly, and exposed skin. I also want to note that so far all I’ve been doing is adding and blending material elements. I blend the elements by using the “clone stamp tool” with my brush set to soft round.
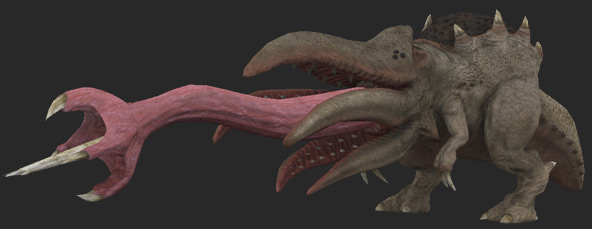
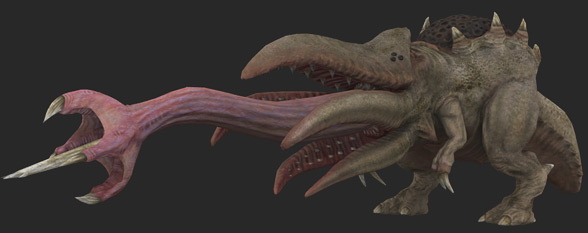
Now that my tongue has a base material on it, it’s time for me to see how it integrates with the body. As you can see from the image below its way too hot and monochromatic! That being the case, it’s time to move on the next step, which involves painting and color blending.
Continuing work on the color, shading and highlights, I kept refining the existing strokes having them blend better with the skin. At this point I want to make sure that I don’t go too far with my highlights and shading, at the same time I want to keep things fairly dynamic and interesting. It’s really just a matter of making good choices and keeping the overall contrast, and color temperature in check!
At this point I’m pretty happy with the overall tone of the skin and will now move onto adding additional details. I made a few new layers within my layer group and started adding a number of little touches to help sell the believability factor of the creature. I really love this stage since it’s the little things that count, elements like scars, skin distortion, dirt, blotches, slime, etc. I created a number of these elements from scratch before hand and placed them where appropriate. You can see some of the results in the close up below.
By the way: I belief that a little goes a long way and I tried to make the extra details noticeable but not overpowering!

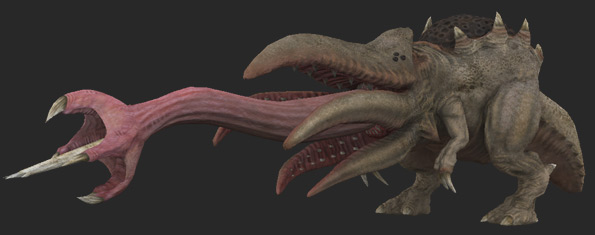
As you can see from the image below I started adding in my color blends along with the shading and highlights. I do this by adding a few layers within the assigned group and set those layers to “normal, color, and overlay”, I generally go over the whole body adding color shifts where appropriate. Areas like the top head, tentacles, legs, back hump, etc. all receive this treatment. The tongue in particular has been given a number of strong highlights to really sell the clammy nature of it. I also blended a bit of color to offset the hot pink that was evident throughout. I decide to use some sky blue for the highlights, blue violet and orange for the mid tones, green for the shadows and a touch of purple for the veins.

In Closing: The method used to create the diffuse thus far is only one way to go and there are number of other avenues that I could have taken. Instead I leaned towards the method that best serves desired visual target.
I
I
I
I
I
I
I
I
I
I