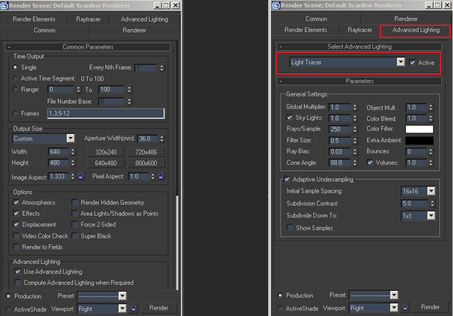
4. I then hit the “F10” key to bring up the “Render Scene” dialog box. After that I selected “Light tracer” under the “Advanced Lighting” tab. As a side note there are a number of cool things you can do under “General Settings” and “Adaptive Under sampling” for some nice bake variants! That being the case I highly recommend investigating what each setting does.
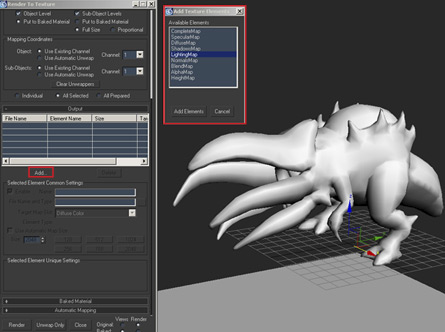
5. The next thing I did was hit “0” on the keyboard to bring up the “Render to Texture” dialog box. From here I pretty much followed the same steps as in normal map workflow with the exception of picking “Lighting Map” from the “Add texture Elements” dialog box instead of Normals Map.
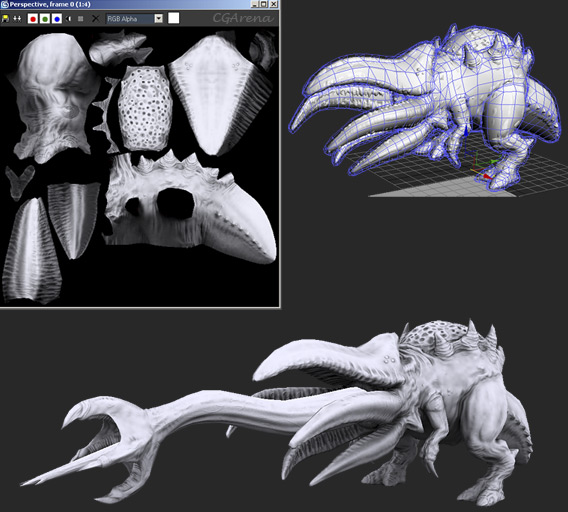
“Special Note” You can also create a light map based off on the low poly geometry instead of the high poly source simply by leaving the “Projection Mapping” / Enabled box unchecked. The reason you may want to do this is to create another light map connecting the shadows to multiple elements. Case and point would be the creature models tongue and body. If you look closely at the image above you can see that the tongue feels disconnected to where the rear of the tongue connects to the body. In this case I generated a second light map, which I later blended with the baked light map. You’ll be able to see the results of this in the next step.
Well that’s it from the baking side of things. This is pretty much my work flow for generating both the normal and light maps within 3ds max.
Step Twelve: Creating the Textures
Before I start I wanted to mention that texture creation is my favorite part of the art pipeline, with sculpting coming in at a close second! There’s something about applying surface texture to an object that I find really appealing, whether it’s an organic creature, weapon, person, you name it. The technique that I’m going to show for this particular model is pretty popular and is commonly used in not only the game industry ("Resident Evil, Assassins Creed, Gears of War, Half Life, just to name of few") but in the film world as well, albeit at much higher resolutions. That being said the art direction I want to go in with Paragalis is going to lean towards a photo real look, think “Walking with Dinosaurs”.
Creating the Diffuse Map
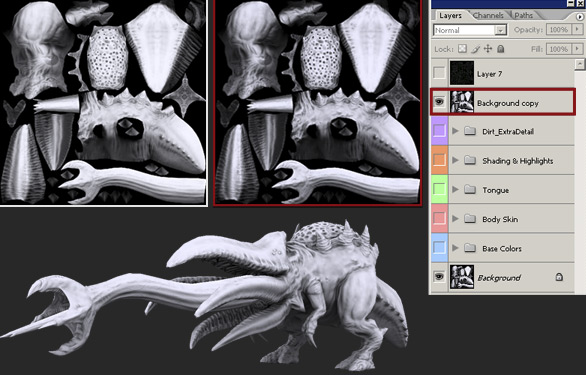
Before I start working on the skin I need to set up my texture sheet and model for better viewing. This is an important step since this will be the foundation for the texture process! First I opened my previously created AO/light map in Photoshop and created a few groups representing each phase of the texture process. The next thing I did was duplicate the background layer and moved it to the top of the layer stack. Once that was done I set the top layer to “multiply” and reduced the opacity to 80%. This setup creates a nice overlay effect giving me all of my shading and highlights. Now that my texture set up is completed it’s time for me to adjust the material in 3dsmax.
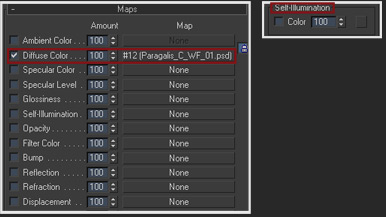
The first thing I did was apply the diffuse texture to the “diffuse color” slot, and then I raised the “Self-Illumination” to 100%. The reason I did this, so that I can see what the actual texture is going to look like every time I save iterations in Photoshop. The only thing that I’m focusing on at this point is the surface texture and color, that’s why I left the normal map and specular slots empty. Having my normal map applied would be futile and almost certainly hamper the diffuse map creation process. This is the case since I would constantly be fighting the normal map due to the way it receives light and shadow. That said I normally don’t apply my normal map until the diffuse and specular maps are completed.
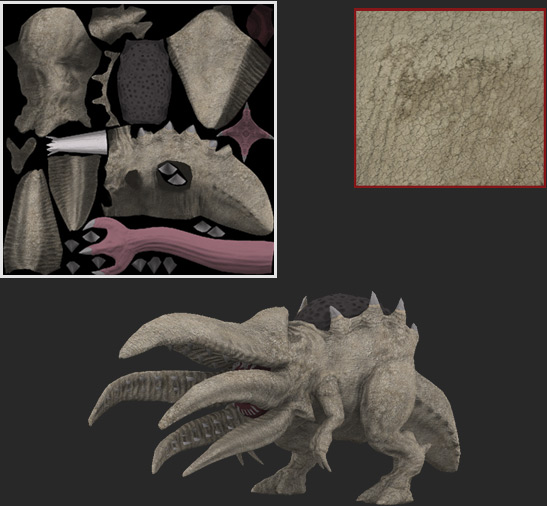
With the color mask applied, I fill the body area with a base skin. The base skin serves as a rough foundation, which allows me to pre visualize what the overall surface texture looks like on the model. For this particular model I used a combination of tree bark, elephant skin, and old paper set at different layer opacities within the Photoshop file. You can see the final base skin composite below.
6. With my cage still intact from the normal map session, I went ahead and did the actual light map render. You can see the results of the bake from the image below.
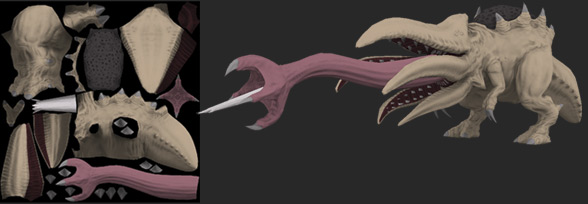
So the next thing I did was fill the texture with the appropriate colors indicating the various surface properties. This is essentially a quick way for me to get a good feel for the creatures color scheme, not only that but the separated colors also serve as a nice mask. I tend to apply all of my base colors into one layer set, which falls under the “base colors” grouping.
Now I have a rough idea on what the skin looks like, it’s time for me to step back and determine what areas are going to receive what color, material and surface values. I do this by making a very quick and simple paint over. This is especially helpful since I’m not working with any fleshed out color concepts and or illustrations.

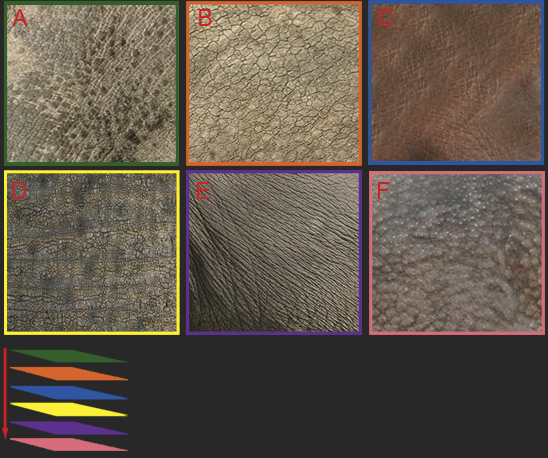
With my color guide in place it’s time for me to assemble my references and materials. My vision for the creature is something that would have fit right at home in prehistoric times. The skin would be a cross between that of an elephant, rhino, pig, and perhaps a dinosaur. Since that's the visual target I went ahead picked a few surface materials from my reference library, as you can see the surface materials pretty much correspond to the creature skin. I also wanted to note that I have an extensive library of material references and fabricated skins that I use to help aid with this process
I
I
I
I
I
I
I
I
I
I